
· by Michael Blair, Nashville's Drywall Repair
Drywall finishing has defined levels, numbered 0 to 5 in the Gypsum Association’s GA-214 quick reference guide, and the one a wall needs depends on the paint going on it and the light falling across it. The Drywall Finishing Council’s paint finish recommendations make the same point from the painter’s side, listing the type of paint and the type of illumination among the things that decide how a finished wall looks. GA-214 expects the areas that need a particular level to be marked on the finish schedule or the plans. In a house, that means saying which level you want in writing before the work starts, so if you are having us hang and finish new drywall, ask for the level in the written estimate.
Which finish level do most smooth walls need?
Level 4 is the one GA-214 says is typically specified for smooth walls that will get flat paint, a light or non-continuous texture, or wallcovering. Every joint and inside corner gets tape bedded in compound; after that the flat joints take two more coats, the inside corners one, and the fastener heads and corner bead three each. National Gypsum’s walkthrough of the five levels adds that a Level 4 surface should be smooth and free of tool marks when it is done. Heavy and medium textures, sprayed or put on by hand, are Level 3 work in the guide, and on a textured wall a repair has to be matched to the existing texture as much as finished.
Level 5 is everything in Level 4 plus a thin skim coat of joint compound, or a product made for the purpose, over the entire surface instead of only the joints. GA-214 calls it the most effective way to get a uniform surface and to keep joints and fasteners from showing through the paint, and it lists three reasons to specify it on a smooth wall: paint with any sheen, a dark or deep-tone color, or critical lighting.
When level five is worth it
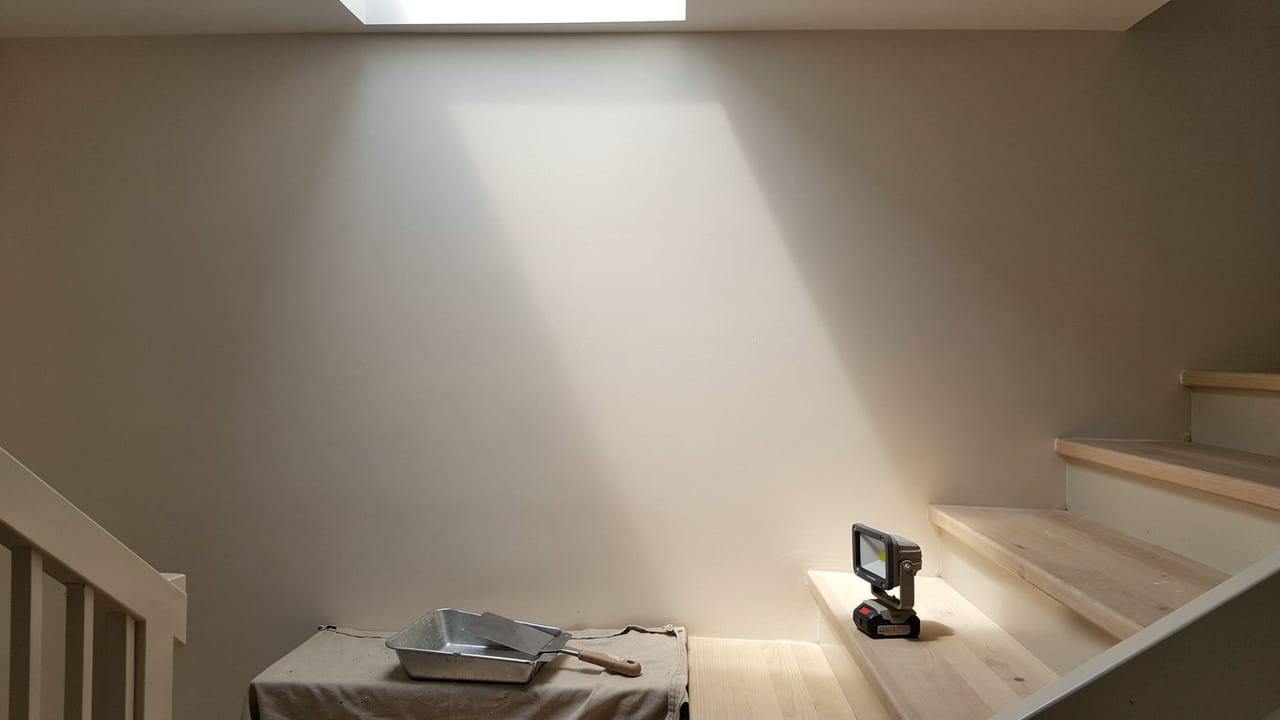
Critical lighting is the Drywall Finishing Council’s term for light that floods a surface at an oblique angle, and the examples it gives are large expanses of windows, glass curtain walls, skylights and surface-mounted light fixtures. In a house, that is the wall running alongside a big window, the stairwell under a skylight, or the wall beside a fixture mounted close to it.
Paint is the other trigger. The Level 4 entry in GA-214 says non-flat and dark or deep-tone paints are not recommended over that finish and points to Level 5, so eggshell, satin, semi-gloss and a deep accent color all belong on a skim-coated wall, where joints and fasteners are less likely to show. The Drywall Finishing Council recommends its own top level of paint finish, one coat of drywall primer and two separate topcoats, under critical lighting or with glossy paint. Ceilings follow the same logic, and our post on refinishing a ceiling to a smooth finish goes through what the skim coat involves overhead.
- Level 4: smooth walls with flat paint, light texture or wallcovering
- Level 5: a skim coat, for sheen, deep colors and critical light
- Put the level in the written estimate before work starts
- Primer choice affects the result too
- On a wall facing hard light, ask for a finished sample area first
What is photo flashing on a painted wall?
Flashing is our word for the patchy look when taped joints and screw lines show through finished paint as stripes and dots that catch the light differently. The standards call it joint photographing, which the Drywall Finishing Council defines as the shadowing of finished joint areas through the decoration, also known as telegraphing. The face paper and the compound do not take paint the same way, which is why the council describes drywall primer as formulated to fill the pores and minimize suction differences between the paper, any texture and the compound over joints, fasteners and skim coats.
Primer helps, and we do not count on it to rescue a wall that needed Level 5. GA-214 names the Level 5 finish as the most effective way to minimize joint photographing, and the council says its Level 5 paint finish, applied over a Level 5 board finish, is the most effective way to minimize joint and fastener photographing. The guide does offer one route short of a skim coat: in critical lighting, flat paint over a light continuous texture may reduce photographing on a Level 4 wall.
Inspecting the work
Before paint goes on, we hold a work light flat to the wall and look along the surface for ridges, crowned joints and fastener dimples. Whatever turns up at that stage gets fixed with compound and a sanding sponge instead of a repaint.
Keep that test in proportion. The Drywall Finishing Council judges a properly painted surface from five feet or more, without magnification, in normal lighting and from a normal viewing position, so a light pressed to the wall will find things the standard does not count. On a wall that will face hard light, the better check is the one GA-214 describes: a mock-up, which when specified becomes the benchmark the rest of the work is accepted against. Ask for a sample area finished and primed on that wall before the whole room is done, and if a wall of yours came out patchy after painting, ask us for a free estimate.
Sources
- Gypsum Association, GA-214-2022 Recommended Levels of Finish for Gypsum Panel Products, Quick Reference Guide (2022) — Levels 0 to 5; coats per level; Level 3 for heavy and medium texture; Level 4 for flat paint and light texture, non-flat and dark paints refer to Level 5; skim coat over the entire surface; Level 5 the most effective method against joint photographing; areas marked on the finish schedule or plans; mock-up as the acceptance benchmark; flat paint over light continuous texture in critical light
- Drywall Finishing Council, Recommended Levels of Paint Finish Over Gypsum Board (rev. 2017) — Paint type and illumination decide the finish; definition of critical lighting; joint photographing and telegraphing; primer formulated to minimize suction differences; Level 5 paint finish of primer and two topcoats; properly painted surface judged from five feet in normal light
- National Gypsum, Discover five levels of gypsum board finish (2022) — A Level 4 surface smooth and free of tool marks
FAQ
Drywall Finish Levels and Why They Matter — questions
What is level 5 drywall finish?
Level 4 finishing, with tape and coats of compound over the joints, corners and fasteners, plus a thin skim coat of joint compound or a product made for the purpose over the entire surface. The Gypsum Association calls it the most effective way to get a uniform surface and keep joints and fasteners from showing through. It is typically specified for smooth walls getting paint with sheen, dark or deep-tone colors, or critical lighting, such as low-angle light from big windows or skylights.
What causes patchy sheen on a newly painted wall?
Joints and fasteners showing through the paint, which we call flashing and the industry standards call joint photographing. Face paper and joint compound draw in paint differently, and the Drywall Finishing Council describes drywall primer as made to even out that suction, so the primer coat matters. On a wall with sheen or strong side light, the Gypsum Association points to a Level 5 skim coat as the most effective way to keep it from happening.
How can I check drywall work before painting?
Look along the wall with a work light held flat to the surface and you will see ridges and dimples that are still easy to fix with compound. Bear in mind that the Drywall Finishing Council judges a painted wall from five feet or more in normal light, so not every shadow a work light finds is a defect. For a wall under a big window or skylight, ask for a finished and primed sample area first; the Gypsum Association treats a mock-up as the benchmark the rest of the work is accepted against.
What are the drywall finish levels?
Levels numbered 0 to 5 in the Gypsum Association’s GA-214 guide, each adding finishing work to the one before. Heavy and medium textures are Level 3 work; Level 4 tapes every joint and adds coats over joints, corners and fasteners for smooth walls with flat paint; Level 5 adds a skim coat over the entire surface.